Did you know that students forget up to 70% of new information within 24 hours if they do not review it? That’s not just a shocking number—it’s a wake-up call. If you spend hours reading or listening but still struggle to remember what you learned, the problem might not be your memory. The real issue could be your study guide. A well-made study guide isn’t just a list of facts—it’s a tool for active recall, making you smarter with every review.
This article shows how to create a study guide that actually helps you remember. You’ll see the science-backed methods, expert tips, common mistakes, and real examples. Let’s turn your notes into a memory powerhouse.
Why Most Study Guides Fail
Most people make study guides by copying lecture slides or writing endless lists. This seems helpful—but it actually encourages passive reading, not remembering. Research shows that without active engagement, your brain loses details fast.
Myth: The more information, the better.
Fact: The right structure and techniques matter more than volume.
A good study guide forces you to think, recall, and connect ideas. That’s how you beat the “forgetting curve. ”
Many students fall into the trap of thinking that if they write down everything the teacher says, they will remember it later. But this approach leads to pages of notes that are hard to review and even harder to understand after a few days.
Instead, focus on making your study guide a tool that helps you interact with the material, not just record it.
Step 1: Set Clear Study Goals
Before you start, define exactly what you need to learn. Vague goals like “review history” don’t work. Try these practical steps:
- Write 3-5 specific topics or questions you must answer.
- Example: “Explain the causes of World War I” is better than “Study WWI.”
Pro Tip: Write your goals at the top of your study guide. This keeps you focused and shows progress.
Clear goals also help reduce overwhelm. When you know your target, you can break big subjects into small, manageable pieces. For example, instead of “study biology,” write, “Understand photosynthesis and list its stages. ” This lets you track your learning and gives you a sense of achievement as you check off topics.
Step 2: Gather And Organize Your Sources
Use reliable materials: textbooks, class notes, teacher handouts, and trusted websites. Avoid random Google results.
Organize your sources by topic, not by the order you received them. For example, group all your math formula notes together, even if they came from different weeks.
Mistake to Avoid: Mixing unrelated facts. This confuses your brain and slows learning.
Another common error is relying on just one source. Different materials often explain concepts in various ways. If you don’t understand a textbook explanation, check your class notes or find a video. Sometimes, seeing the same idea presented differently helps it “click.
”
When you organize your sources, make a simple checklist. For example, if you’re studying chemistry, list “Periodic Table,” “Chemical Bonds,” and “Acids and Bases. ” Then, gather all the notes and resources for each topic into one place. This makes your study guide clearer and more useful.
Step 3: Choose The Right Study Guide Format
Not all study guides are the same. The best format depends on your subject and style.
Here’s a quick comparison:
| Format | Best For | Why It Works |
|---|---|---|
| Outline | History, Literature | Shows main ideas and supporting details clearly |
| Flashcards | Vocabulary, Formulas | Encourages active recall, fast review |
| Mind Map | Complex topics | Visualizes connections between ideas |
| Summary Table | Comparisons, Lists | Quickly shows similarities/differences |
Pick one or combine them. For example, use an outline for big topics and flashcards for details.
If you’re a visual learner, mind maps and diagrams might help more than text. For students who like structure, outlines or tables can make information less overwhelming. Don’t be afraid to try different formats for different subjects until you find what fits you best.
Over time, you may even develop your own unique style.
Step 4: Break Information Into Chunks
Chunking means grouping related facts together. The brain remembers chunks better than long lists.
- For science: Group all facts about “plants” together before moving to “animals.”
- For languages: Learn verbs in one group, nouns in another.
Tip: Limit chunks to 5-9 items. This matches your brain’s working memory.
For example, when learning about the water cycle in geography, break it into “evaporation,” “condensation,” “precipitation,” and “collection. ” This approach also helps when you need to remember steps in a process or stages in an event.
Beginners often try to memorize long paragraphs, but the brain prefers short, related groups. If you’re learning history, chunk by events (for example: “Causes of WWII,” “Main Battles,” “Results”), not by year or textbook chapter.
Step 5: Use Active Recall Methods
Active recall means testing yourself instead of just reading. It’s proven to double retention.
Ways to build active recall:
- Write questions for each chunk.
- Cover answers and try to recall from memory.
- Use flashcards (paper or apps).
Example: Instead of copying “Photosynthesis makes food for plants,” ask “What is photosynthesis?”
You can also create “fill in the blank” exercises or short quizzes. For group study, quiz each other out loud. The key is making your brain work to find the answer, not just reading it.
A less obvious tip: after reviewing a chunk, close your guide and try to write out everything you remember on a blank page. Check what you missed and focus your next review there. This method is powerful but often skipped because it feels harder—it works because it is hard!

Credit: www.amazon.com
Step 6: Add Spaced Repetition
Reviewing many times is better than one long session. Spaced repetition means you revisit material at increasing intervals—like after 1 day, 3 days, 1 week.
Apps like Anki or Quizlet can automate this. If you’re using paper, write review dates on each section.
Warning: Cramming the night before a test creates fast forgetting.
Spaced repetition works because it reminds your brain just as it’s about to forget. Each review strengthens your memory. For example, review your history guide on Monday, Thursday, and then again the next week. If you get a question wrong, bring it back sooner.
A smart addition is to color-code or mark topics based on how well you know them. Review “red” topics more often, “green” less.
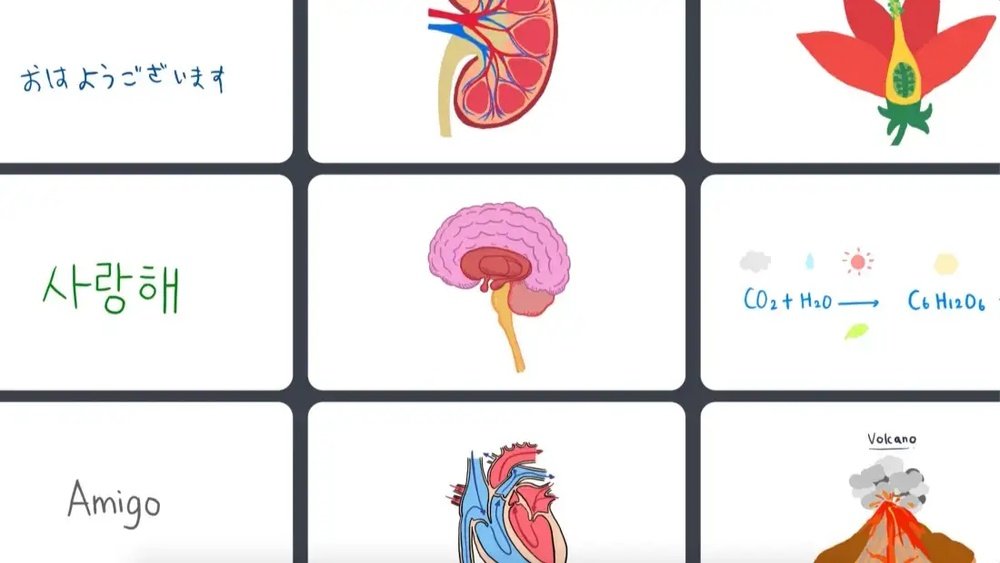
Step 7: Visual Aids And Diagrams
A picture really is worth a thousand words. Visual aids help you understand and remember complex ideas.
- Draw diagrams for science processes.
- Make timelines for history.
- Use color-coding for subjects or importance.
Beginner Insight: Even simple stick figures or arrows can boost memory. You don’t need to be an artist.
Visuals give your brain “anchors” to hold onto. For example, drawing a food web in biology helps you see relationships quickly. Flowcharts are great for processes, like “How a bill becomes a law. ” For math, sketching a graph or labeling angles can clear up confusion.
If you use colors, assign a meaning—maybe red for important facts, blue for definitions, green for examples. This makes scanning your guide before a test much faster.
Step 8: Summarize, Don’t Copy
Summarizing means putting ideas in your own words. This forces your brain to process meaning, not just appearance.
- Read a section, cover it, then write a summary.
- Use short sentences and bullet points.
- Highlight only key terms, not entire sentences.
Common Mistake: Copying slides or textbook lines. This feels productive but does not help recall.
When you write your own summaries, you’re actually teaching yourself. If you find it hard to explain a topic simply, that shows you need to study it more. Don’t worry about perfect grammar—just focus on clear understanding.
A useful trick: imagine you’re explaining the concept to a younger student or a friend who has never studied the topic. If you can do that, you know the material well.
Step 9: Build In Practice Questions
Create practice questions for every topic. These can be from past exams, your teacher, or ones you write yourself.
Advanced Tip: Write questions that require explanation, not just facts. For example, “Explain why X happens” is better than “What is X?”
Mix different types of questions: multiple choice, true/false, short answer, or even create a “mini test” for yourself. Look for patterns in past tests—teachers often repeat question types. Practicing in the same format as the actual test can also reduce anxiety.

Credit: www.teacherspayteachers.com
Step 10: Review And Edit Your Guide
After your first draft, test yourself. Find weak spots—places you can’t recall easily. Add more examples, visuals, or questions there.
Ask a friend to quiz you or explain a tough part to someone else. If you struggle, rewrite that section.
Editing is not a one-time job. Each time you review, you’ll find sections that need more detail or clearer wording. Over time, your guide becomes sharper and more useful. Regular updates keep your knowledge fresh and your study sessions efficient.
Do’s And Don’ts Of Study Guide Creation
Here’s a quick reference:
| Do | Don’t |
|---|---|
| Summarize in your own words | Copy long textbook passages |
| Use active recall questions | Only read or highlight |
| Include visuals and examples | Rely only on text |
| Space out your reviews | Cram the night before |

Credit: www.naham.org
Real-world Example: Turning Boring Notes Into A Powerful Guide
Let’s say you’re studying cell biology.
Typical notes:
- The cell is the basic unit of life.
- Cells have membranes.
- There are prokaryotes and eukaryotes.
Better study guide:
- Chunk 1: What is a cell? Write your own definition.
- Chunk 2: Draw and label a simple cell.
- Chunk 3: List the differences: prokaryote vs eukaryote (make a table).
- Chunk 4: Practice question: “Explain why the cell membrane is important.”
This method forces you to recall, draw, and explain.
You might also add a diagram showing a side-by-side comparison of cell types. Or, record yourself explaining the differences, then listen back to see if your explanation is clear. These extra steps turn “just notes” into real understanding.
Pro Tips For Maximum Retention
- Teach someone else: Explaining out loud reveals gaps in your memory.
- Mix up topics: Don’t study the same way every time.
- Review before sleep: Sleep strengthens memory.
Try “interleaving”—mixing different types of problems in one session. For example, if you’re studying math, alternate between algebra and geometry questions. This keeps your brain alert and improves long-term learning.
If you hit a mental block, take a short break or switch subjects. Sometimes, stepping away helps ideas settle, and you’ll remember better when you return.
Common Study Guide Myths Vs. Facts
| Myth | Fact |
|---|---|
| Writing everything helps remember | Summarizing is much more effective |
| Highlighting is enough | You must test yourself actively |
| More hours = better results | Quality of study beats quantity |
Another myth: “If I don’t understand at first, I never will.” In reality, repeated review and different study methods help almost everyone master tough subjects over time.
Key Takeaways
- set Clear Goals For Every Study Session.
- organize Information By Topic And Chunk Ideas.
- use Active Recall And Spaced Repetition For Memory.
- visuals And Your Own Summaries Work Best.
- regularly Review And Update Your Guide For Weak Spots.
Frequently Asked Questions
How Long Should My Study Guide Be?
A good study guide is as short as possible but as detailed as needed. Focus on key concepts, not every fact. If you can review it in 20–30 minutes, you’re on the right track.
Should I Handwrite Or Type My Study Guide?
Handwriting helps most people remember better because it forces slower, active thinking. But typing is good for organizing and editing. Try both and see which helps you recall more.
How Often Should I Review My Study Guide?
Review after 1 day, then after 3 days, then weekly. This uses spaced repetition and matches how the brain best remembers.
What Is The Best Way To Use A Study Guide Before A Test?
Test yourself using your guide. Cover answers, explain ideas out loud, and do practice questions. Don’t just read—actively recall information.
Where Can I Find More Tips About Effective Study Methods?
Check trusted resources like Cornell University for evidence-based study techniques.
A strong study guide is not a “cheat sheet”—it’s your brain’s best friend. By using these steps, you’ll remember more, forget less, and walk into exams confident. Start building your own today, and you’ll see real results.